This text has been printed from storiesandnovels.com and is copyrighted by the author, Franz Jørgen Neumann. It can only be printed for personal enjoyment. No other use without express permission is allowed. Inquiries can be sent to franz@storiesandnovels.com.
BBEdit for Writers
BBEdit is a text editor that’s been around for over twenty-five years and bears the laudable trademark: “It doesn’t suck.®” It has the essentials: spell-checking, word count, split-screen view, Markdown support, and backups. It also gives writers the ability to fold content, easily navigate long documents, find differences between drafts, and more.
Ready to give it a try? First, download and install BBEdit. It’s free to use without any time limits, with a paid version offering additional features. The PDF user guide at › is excellent. Below are tips for adjusting BBEdit for prose writing, along with some of the features that make it useful for writing stories, novels, and everything in-between.
- Tailor BBEdit’s Preferences for Writing
- The Sidebar & Disk Browser
- Writing in Markdown
- The Text Status Bar
- Navigating Long Documents
- Text Folding
- Splitting the Editor View
- Editing & Proofing
- Outlining
- Exporting Your Text To Other Formats
- Additional Features
1. Tailor BBEdit’s Preferences for Writing
BBEdit’s extensive preference settings can give you the impression that you’re building your own customized text editor—turn this feature on, turn that one off. The settings below are those I’ve found most useful. You can access the preferences under › in the menubar.
Appearance
In the Appearance pane, the only checked boxes should be for Function menu (none of the items under Function menu, though), Gutter, Language, Document statistics, and Text magnification.
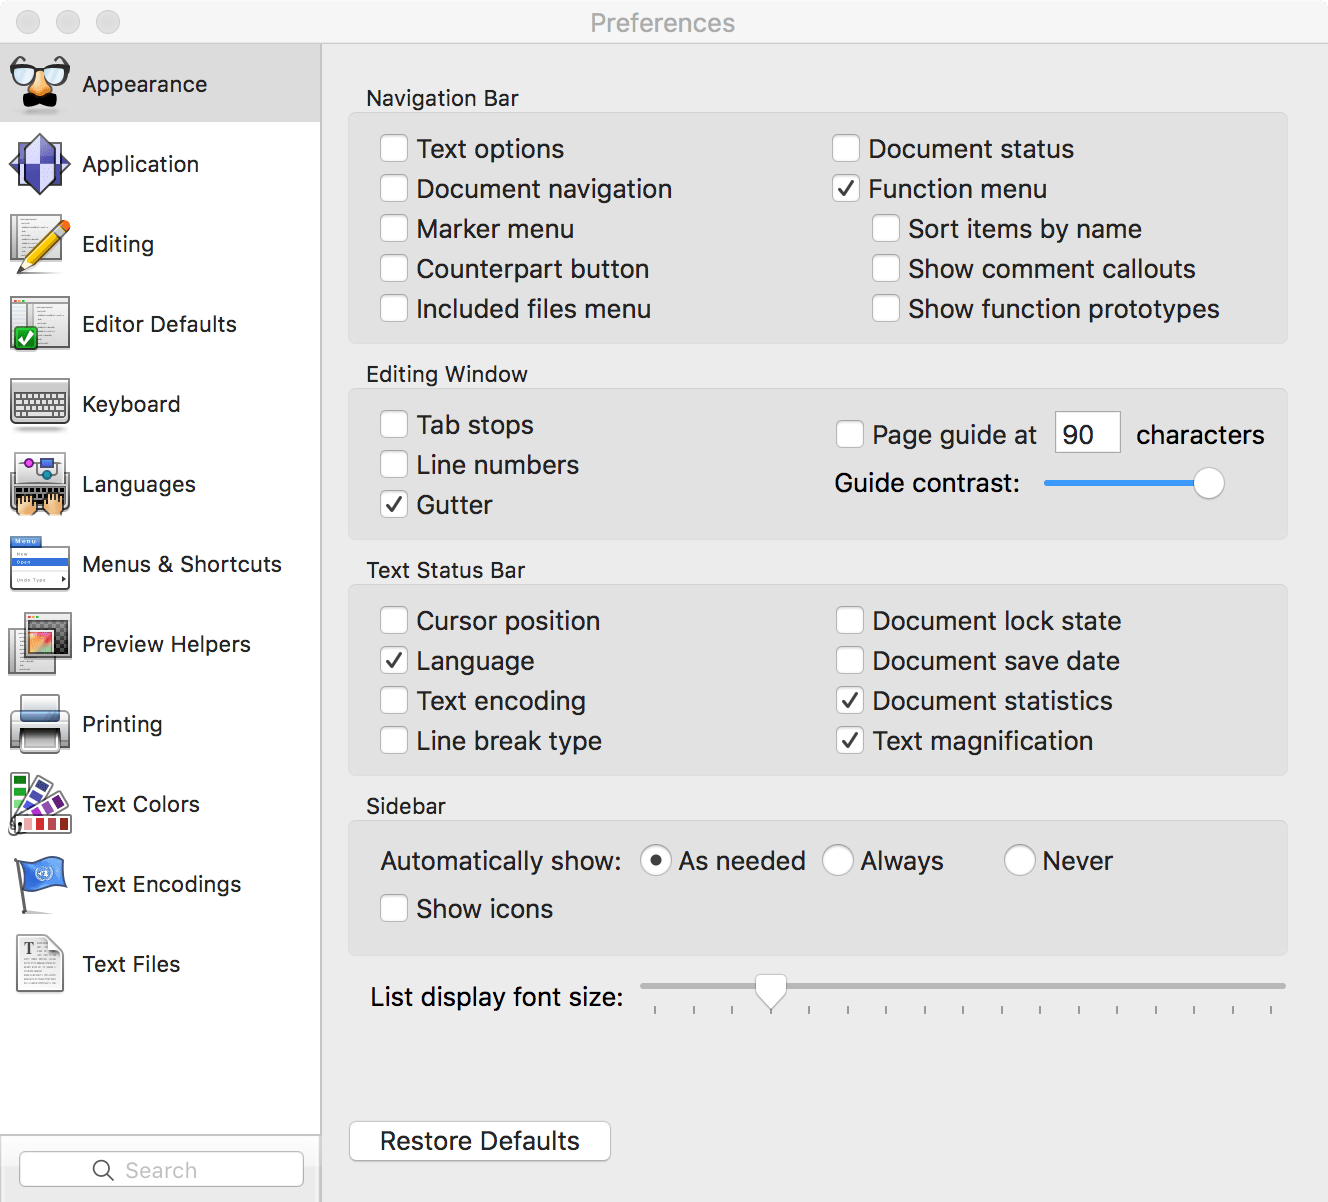
Above: The Appearance Pane at › ›
Application
Change “when BBEdit becomes active:” to “Do nothing.”
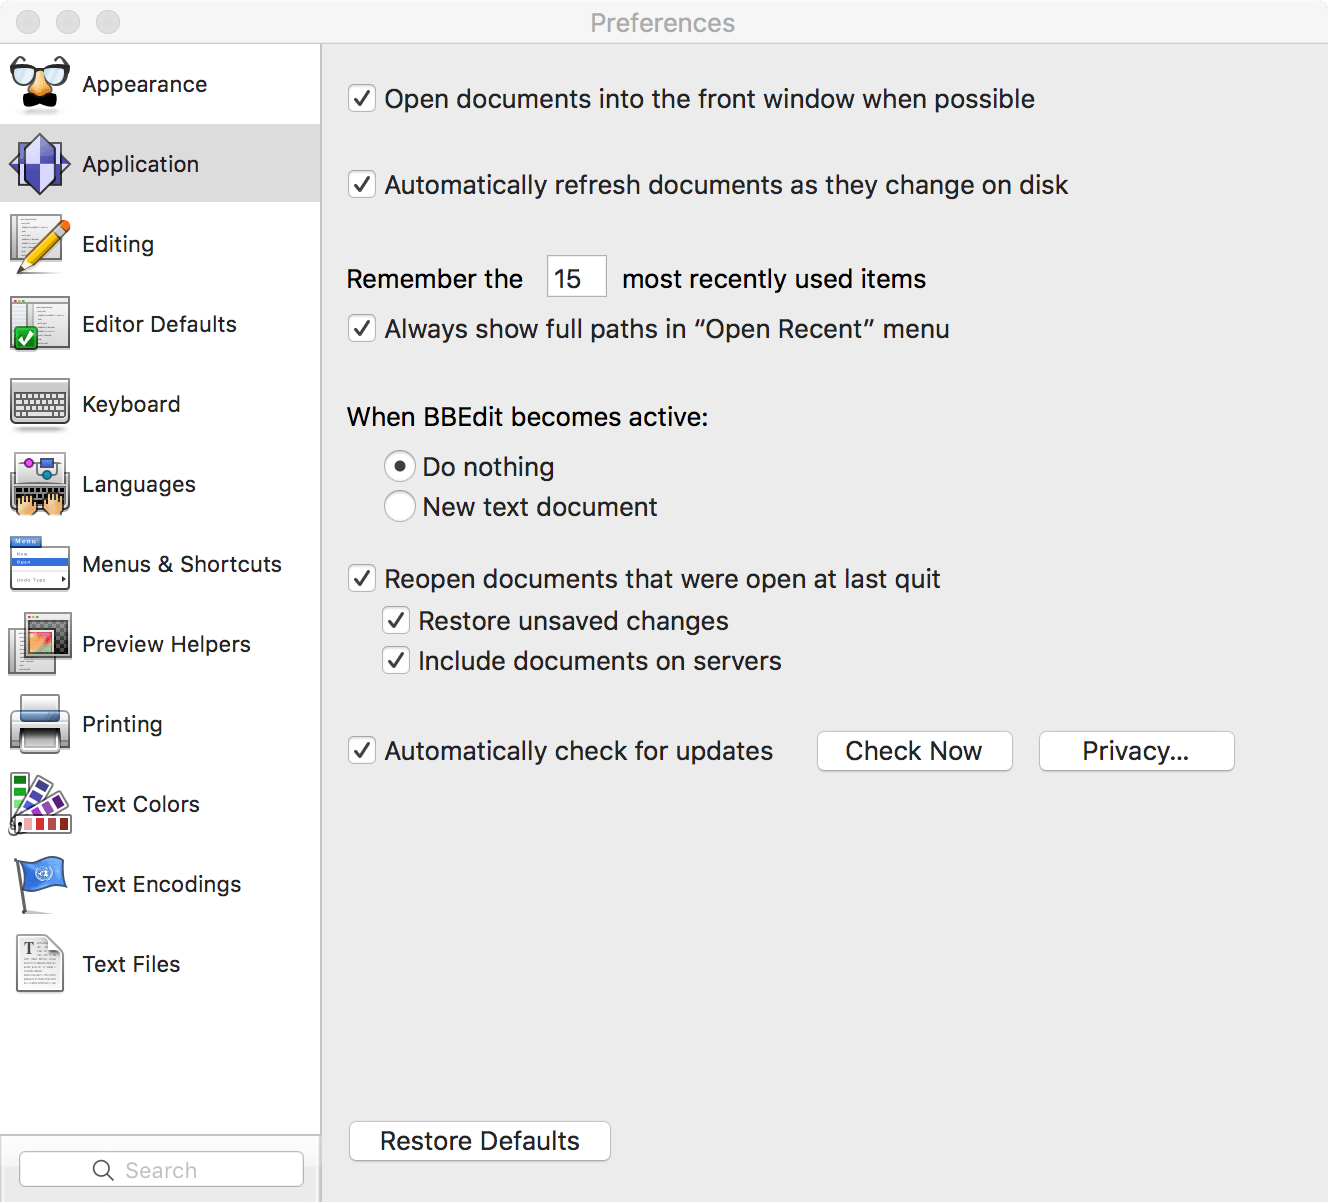
Above: The Application Pane at › ›
Editing
Change “Show text completions” to “Only manually”. Uncheck “Display instances of selected text”. (We’ll come back to that later.)
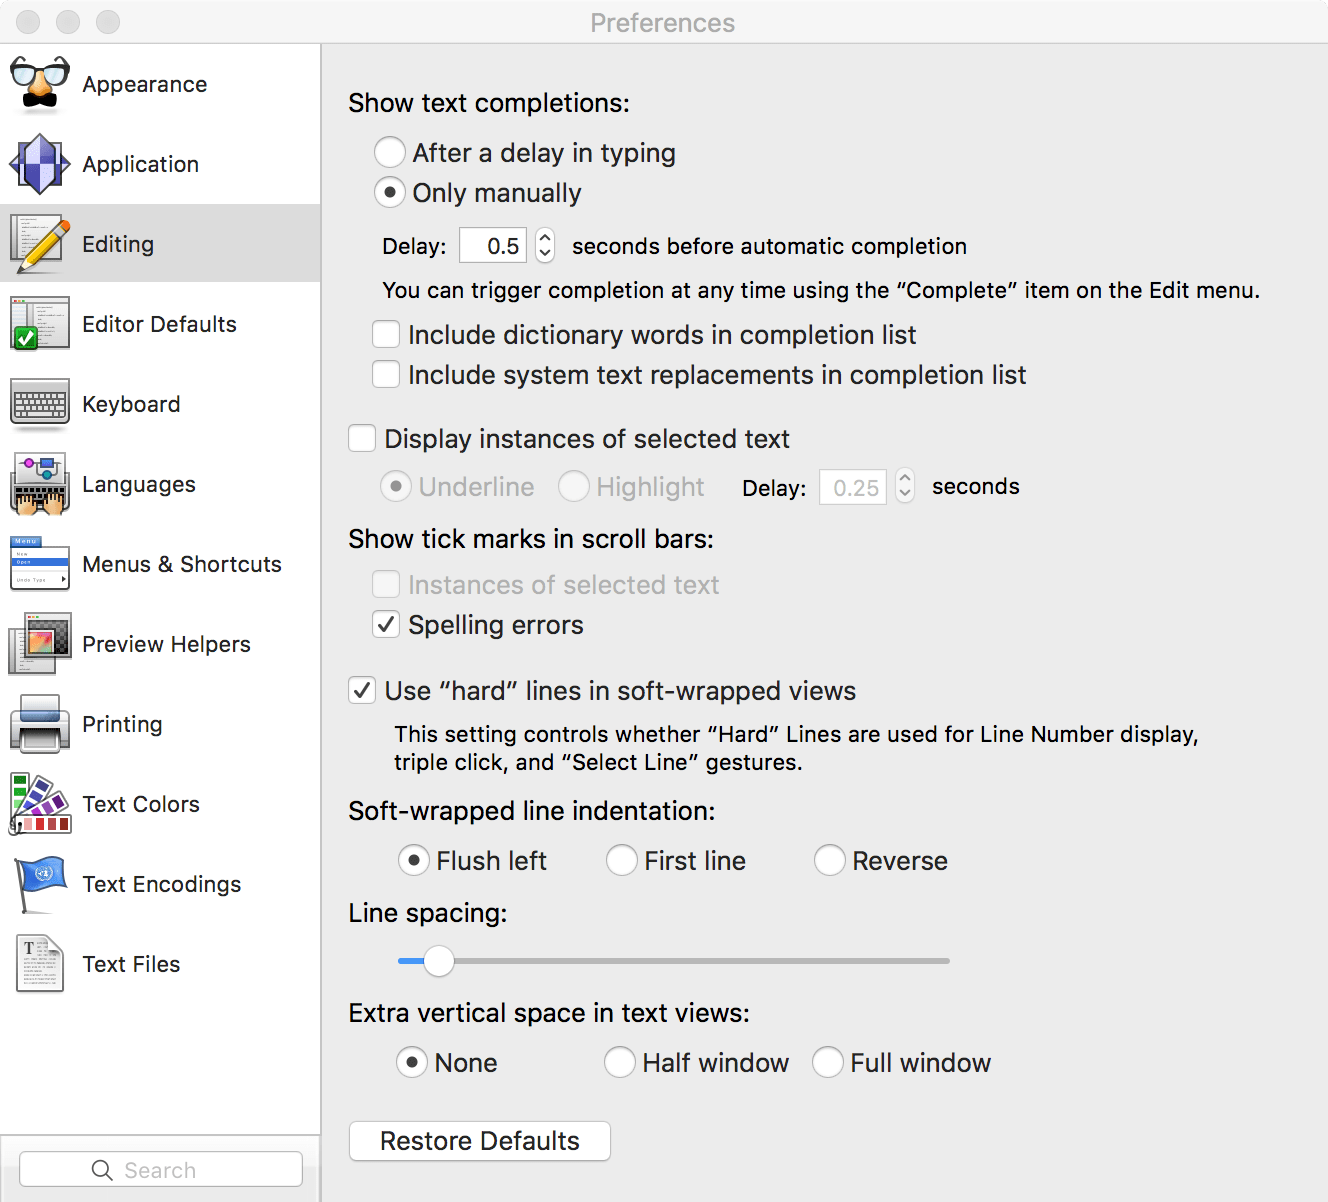
Above: The Editing Pane at › ›
Editor Defaults
Uncheck “Auto-indent” and “Balance while typing”. Check “Use typographer’s quotes”. Check “Soft wrap text to:” and select “Character width:” and enter a width. The default is 80. Next, click “Select” for “Default font” and choose your favorite font and size.
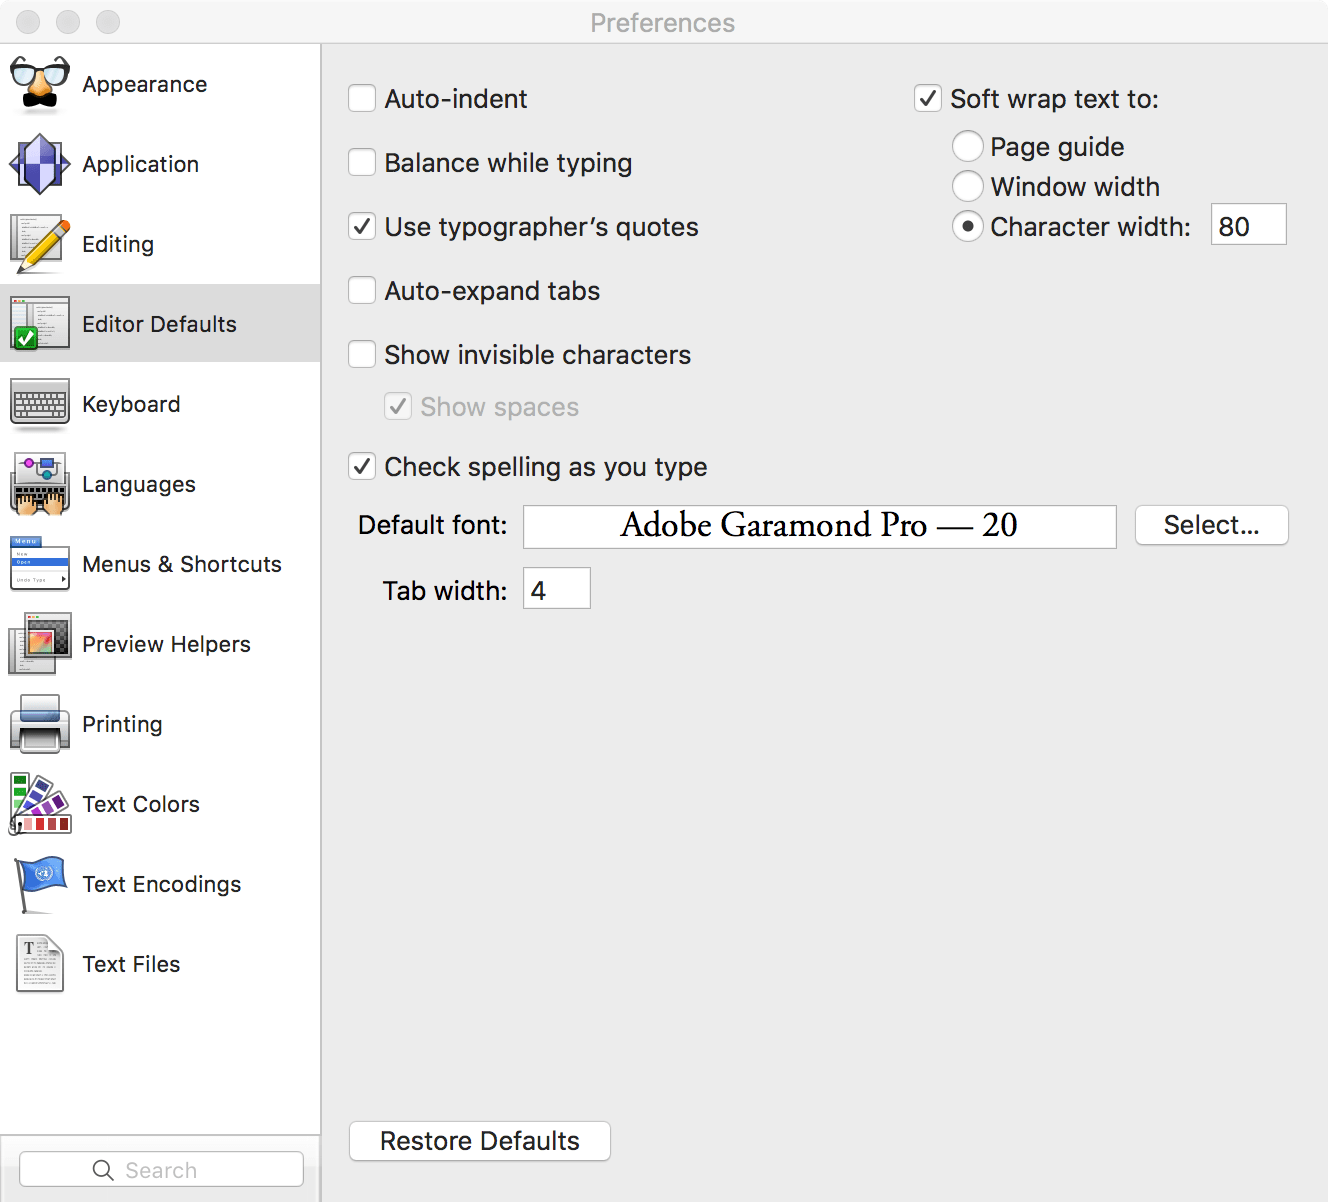
Above: The Editor Defaults Pane at › ›
Keyboard
Leave all settings as they are.
Languages
Leave all settings as they are.
Menus & Shortcuts
Under Menus & Shortcuts, you’ll discover that you can edit which menu items appear in BBEdit’s main menu. It’s also where you can set custom shortcuts for your favorite menu items. Personally, I uncheck the following menu items: #!, P4, Subversion, Git, and Scripts. This leaves us with the features we need and a much less intimidating-looking set of menus (for a non-programmer). Later, feel free to turn those menu items back on and see if they have useful features for your writing workflow.
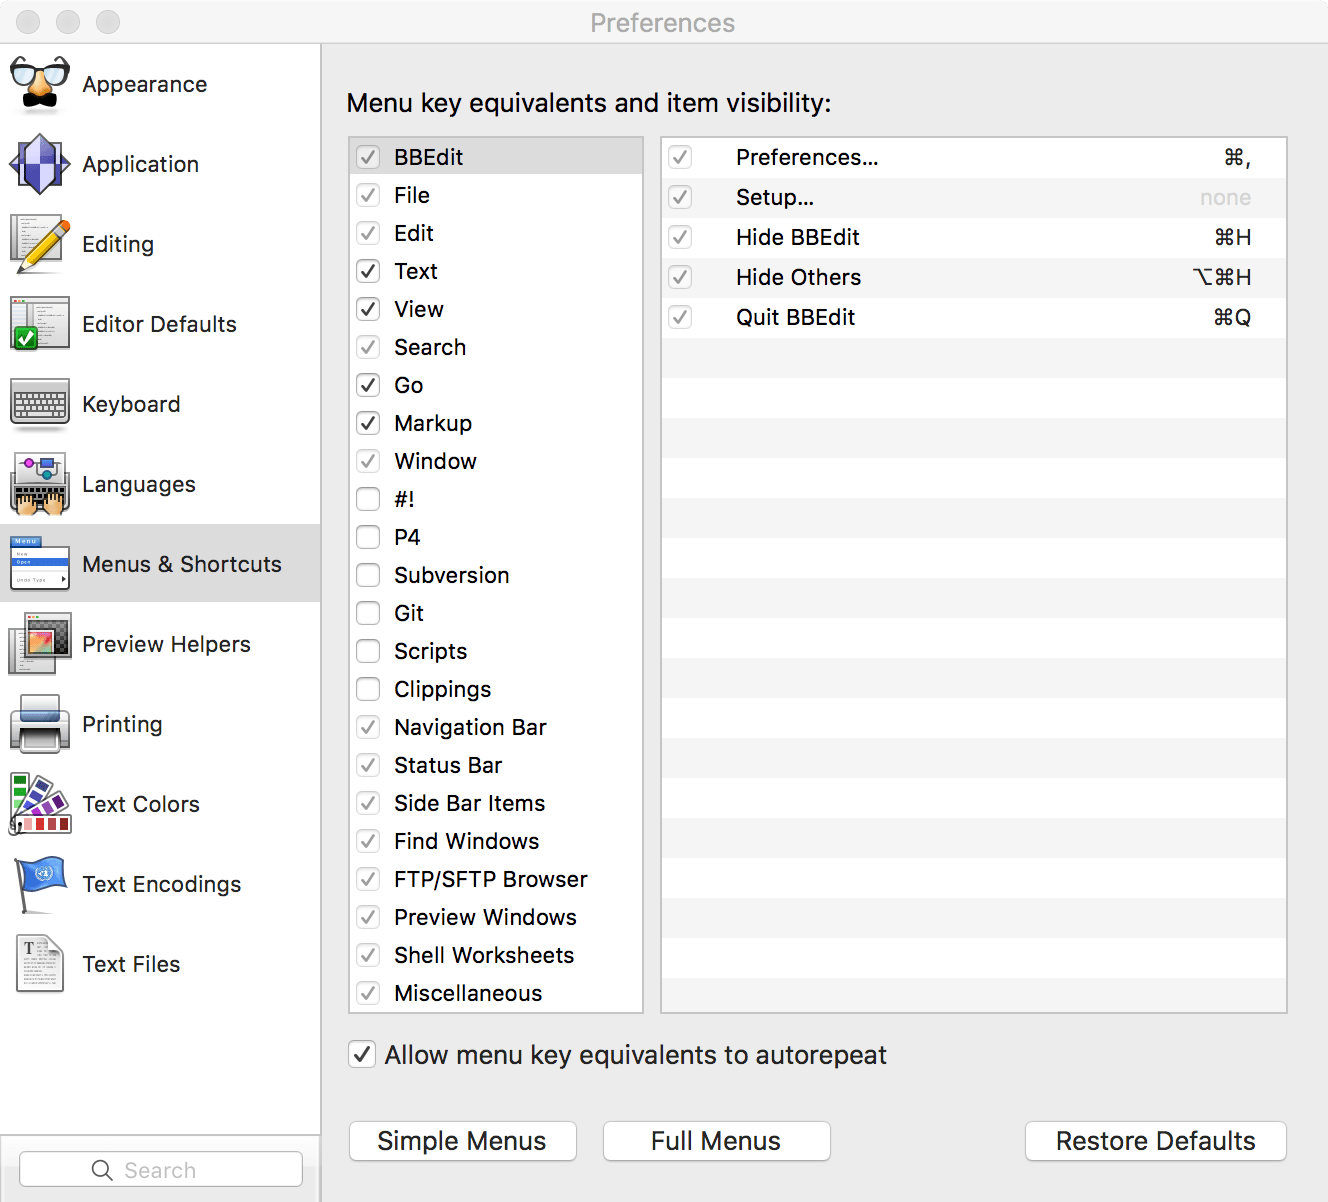
Above: The Menu & Shortcuts Pane at › ›
Preview Helpers
Leave all settings as they are.
Printing
Leave all settings as they are.
Text Colors
Be sure that “Highlight insertion point” is unchecked, unless you prefer having your current line of text highlighted.
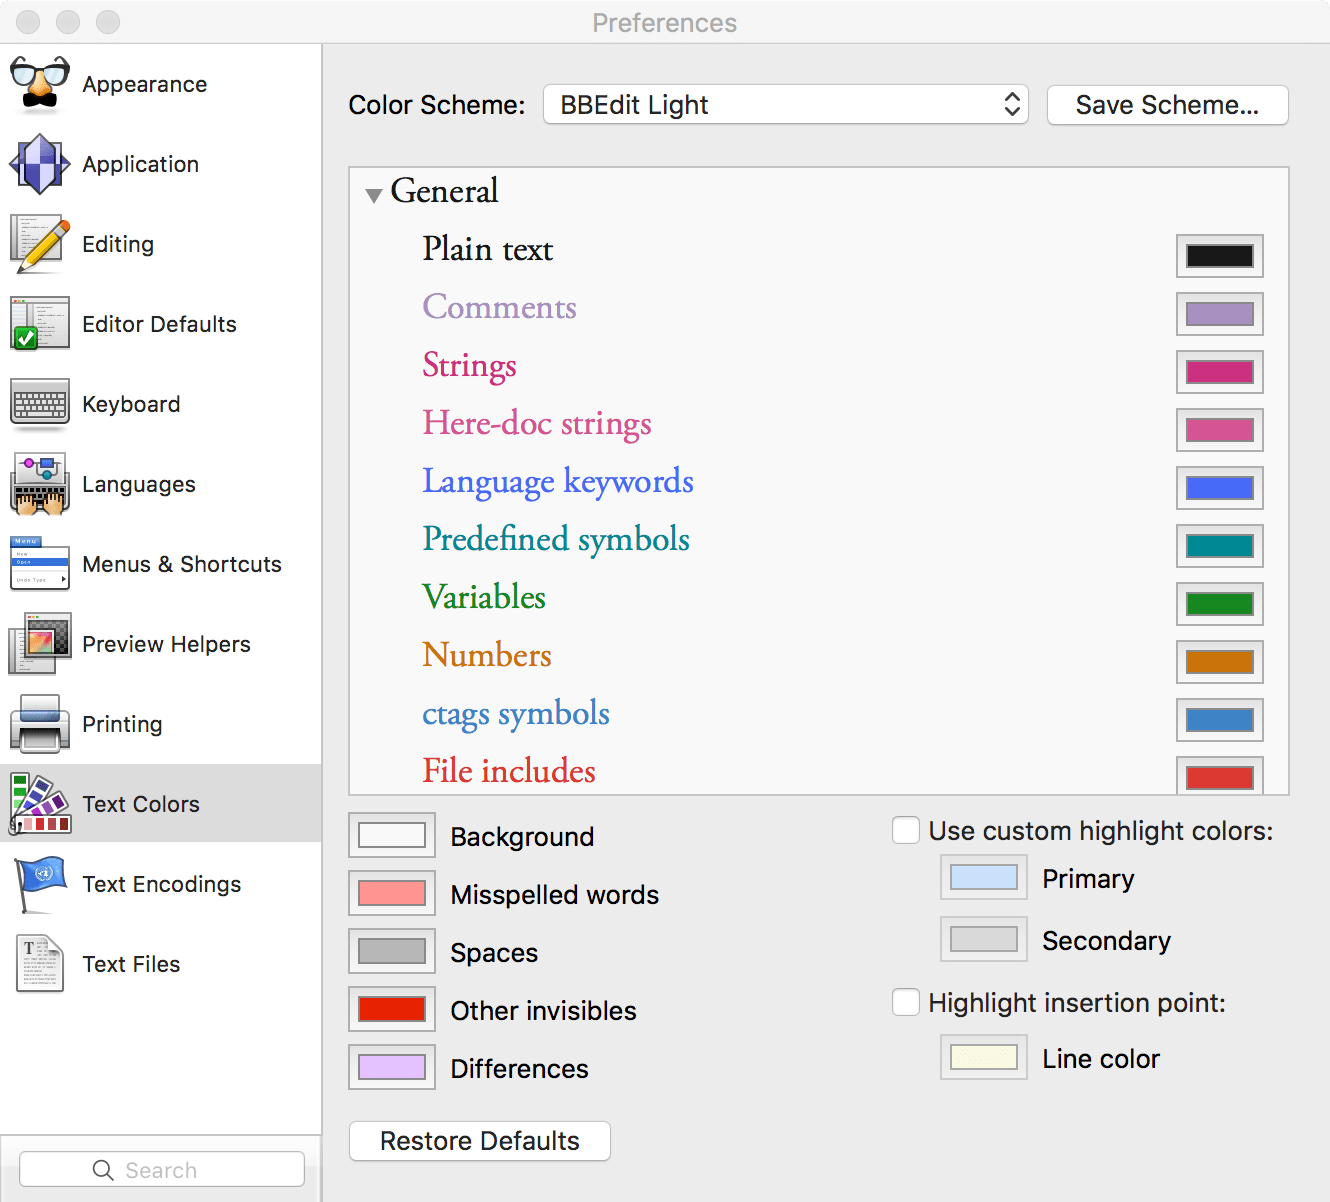
Above: The Text Colors Pane at › ›
Text Encodings
Leave all settings as they are.
Text Files
Check “Make backup before saving” and “Keep historical backups.” Because text files are so small, there’s no reason not to have as many backups as possible.
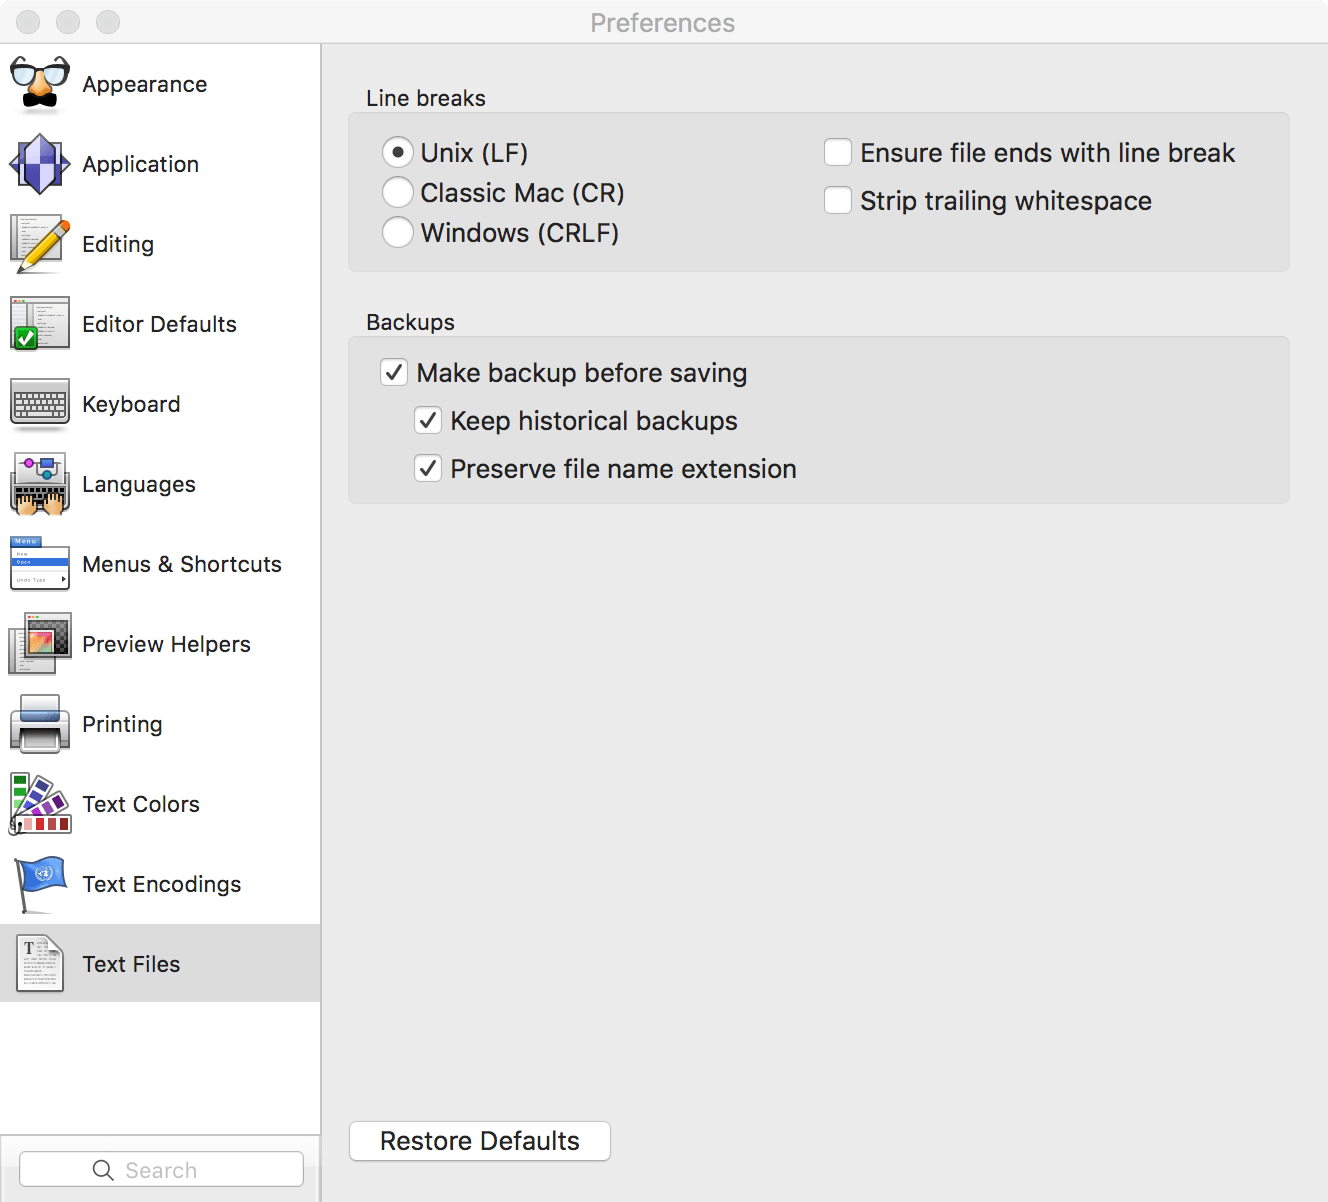
Above: The Text Files Pane at › ›
Now that we’ve made all of the above adjustments to the preferences, let’s see them in action. Close any BBEdit windows that may be open and create a new document using › › , or command+n. Welcome to the new editing window.
2. The Sidebar & Disk Browser
By default, BBEdit opens documents into the front window. If you have more than one document open, you’ll see the sidebar open on the side, allowing you to navigate between documents. To assign your own keystroke to toggle the sidebar open or closed, visit › › and assign the Sidebar a shortcut. Note that the sidebar only shows currently open documents. It’s not a file browser. To view one of those, choose › › . If you’d prefer to never see the sidebar but instead have all documents open in their own windows, uncheck “Open documents into the front window when possible” at › › .
3. Writing in Markdown
We can tell BBEdit we’ll be writing in Markdown—and gain text coloring of certain elements—by saving our document with the .md suffix, or by choosing Markdown from the languages menu in the lower left corner of your editing window. Do that and you'll notice that things like *italics* and **bold** now show up with a different color to help them stand out. You can adjust the colors used for Markdown-formatted text under › › › . You may need to scroll down that list of colors to see the ones for Markdown.
4. The Text Status Bar
The Text Status Bar sits at the bottom of the editing window. It not only contains the Language drop-down menu where we selected Markdown, it also shows our live characters/words/line count and our text magnification drop-down menu.
5. Navigating Long Documents
In a new window, type the following:
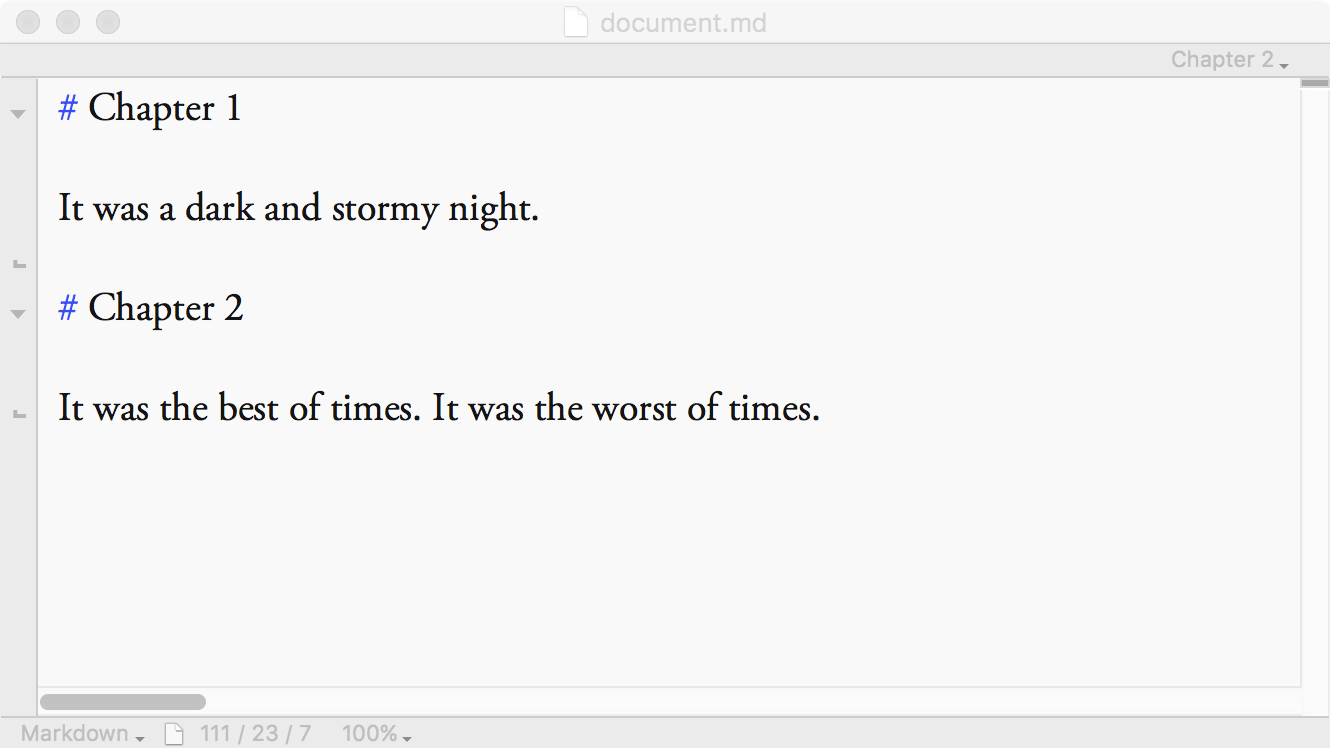
Note that BBEdit changed the color of the header marker because we’re writing in Markdown. (If you don’t see the blue hashtags, be sure to select Markdown from the Language menu).
At the top of our document we have the Navigation Bar. And because we’ve added a couple of headers to our document, we can see the names of those headers in the drop-down menu on the right side of the Navigation Bar. Any header (indicated by “# Title of Your Header”) will automatically show up here. Clicking an item in this menu jumps you to that header in your document. This becomes extremely useful if you write a novel in one file, letting you easily jump through to various chapters, lists of characters (# Characters), plot points (# Plot), and other supporting material.
To make this navigation menu even more useful, assign a key-combination in › › › › . The ESC key will close the menu. You can use your trackpad/mouse/etc. or arrow keys to navigate the menu when it’s open and the Return or Enter key to select that section of your document.
6. Text Folding
You’ve probably noticed the gray bar running vertically along the left of your editing window. That’s the gutter. Click the triangle next to “# Chapter 1” and you can collapse (or hide) all the text under that section. Click the triangle or the three dots to expand that section to its original appearance. You can collapse more than one section at a time. If this doesn’t feel like something you’d use, you can hide the gutter completely for new documents in the Appearance preferences or hide it in the current document by going to › › .
7. Splitting the Editor View
Creating two views into the same document can be useful for looking up plot points or character lists without leaving the text you’re currently editing—or any time you need to reference one part of your document while working in another section of the same document. To split the editor view, click the dark gray line at the top of the scrollbar. You can drag the new horizontal divider up or down to your liking. You can also use the navigation menu (# Chapter 1, etc.) to individually jump to areas of your document for both divided sections. To close the split screen and return to a single view, double-click on the bar.
8. Editing & Proofing
Let’s say you’ve finished a draft of your manuscript and it’s time to edit. Like a word processor, BBEdit can spell-check your document. But it can do much more.
Display instances of selected text
Sometimes it’s useful to see how often a certain word has been used, or where it was last used. In the Editing Preference pane, turn on "Display instances of selected text" then select a word or phrase. BBEdit will now bring attention to all instances of that word or phrase. You can even choose whether you want the word/phrase to be underlined or highlighted, how long before this kicks in, and whether you want to see tick marks in the scroll bar indicating all the places a repeated word or phrase appears.
Display common word errors
You can also feed BBEdit a list of the most common spelling or word errors (their/there, it’s/its, affect/effect, etc.) and have those possible errors all highlighted for you as you proof your document. To do this, you’ll need to install a new language module called Grammar.plist, found here. Click the "Download Zip" file, then, in the Finder, hold down the option key and click › . Click Application Support/BBEdit/Language Modules and put your downloaded file, "Grammar.plist" into the Language Modules folder. Now, in BBEdit, change your Language from Markdown to Grammar (using the Language menu in the lower left corner of your editing window) and all the words in the Grammar.plist module will be highlighted. You can even edit the list of words in the Grammar.plist by opening this file in BBEdit. Now you’ll have a file that only targets words you often misuse.
There are even color schemes and language modules that will find places where you’ve duplicated duplicated words in your writing. For more on this topic and using language modules to help you proof your document, read "Custom Grammar Checker in BBEdit" at MacDrifter.com and Nathan Grigg’s "BBEdit Grammar Highlighting."
9. Outlining
BBEdit can be used to outline plot points using tabs to differentiate different levels, like this:
# Novel Outline
CHAPTER 1: The Meeting
Boy Meets Girl
A strange wind blows past
Boy and Girl Talk About BBEdit
Girl reveals she’s his guardian angel
CHAPTER 2: Driving to the Place
This one thing happens
Another thing quickly follows
There are shortcuts that can make working on a list of items easier. In BBEdit, go to › › (and Move Line Down) and you’ll find you have the ability to reorder items in your outline. To make this as easy to do as possible, go to › › › › › (and Move Line Down) and set a shortcut for each. Now, with just a keystroke, you can move plot points up and down your Outline—no copy & pasting needed.
10. Exporting your text to other formats
There may come a point where you’ll need to export your Markdown writing to another application such as a word processor, page layout application, or e-book creation software. File/Save as Styled Text and File/Save as Styled HTML are not the options to use. Instead, with your Markdown file open in BBEdit, choose › . You should now see your document, but with proper italics, bold, headers, etc. Now simply copy & paste the preview text into another applications and all the italics, bold, and other structure will be intact. If you want more flexibility, you can also use Brett Terpstra’s Marked to transform your Markdown text into many other formats.
11. Additional Features
In addition to the features above, you may find yourself digging deeper into what BBEdit has to offer, such as opening and saving files directly on a server ( › ), creating Project files that can keep all your files organized ( › › ), finding differences between drafts ( › ), filtering and cleaning up text ( › ), or using the Scratchpad for jotting down notes as you write ( › ).
About this post and your author: I’ve logged thousands of writing hours in BBEdit. This post and website are free of affiliate links, analytics, ads, cookies, and trackers of any kind, and I have no financial relationship with the developers.
You may also be interested in my post about iA Writer.